


Leaving already?
Can we tempt you with 5$ off your first order?
Min Order of $50


Care Guide & Supplies
Free reef tank care guide and supplies: cycling, water chemistry, lighting, flow and beginner corals, with a stability-first approach.
Habitat, diet, lighting, troubleshooting and a first-48-hours quick start. Free, no email required — from our family in Lancaster County to yours.
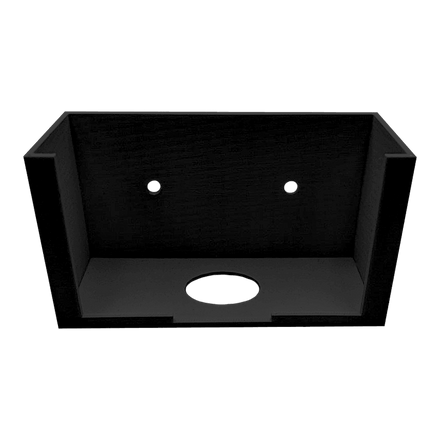
Adaptive Reef Toggle Box Bracket
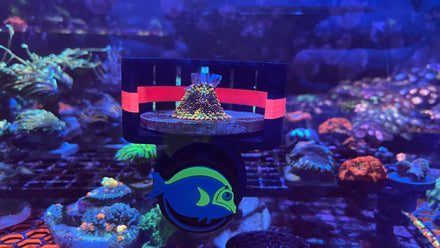
ClearShroom — Magnetic Mushroom Cage by Rhino’s Reef
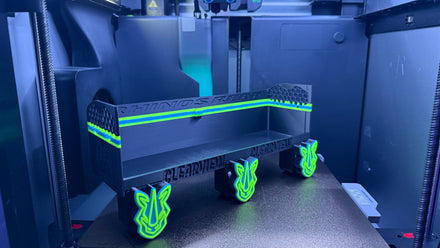
ClearView 10” – Ultra-Clear Coral Viewer for Reef Tanks
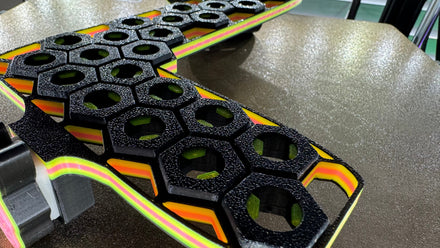
Nexus L-Rack – Rhino’s Reef Premium Magnetic Frag Rack
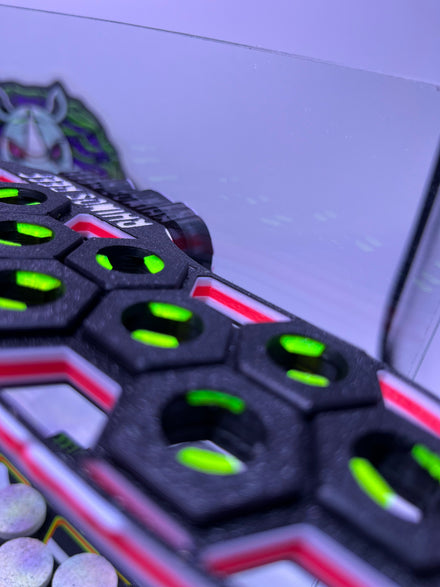
Nexus XL Frag Rack – Rhino’s Reef Premium Magnetic Frag Rack
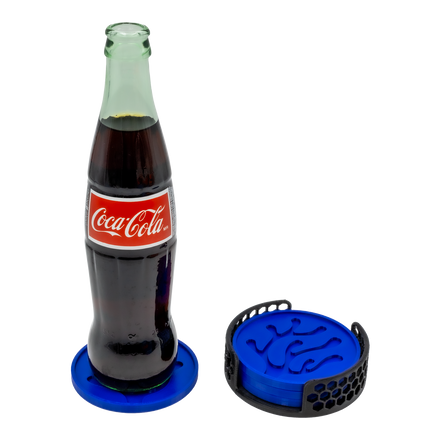
Printed Reef Coral Coasters Set
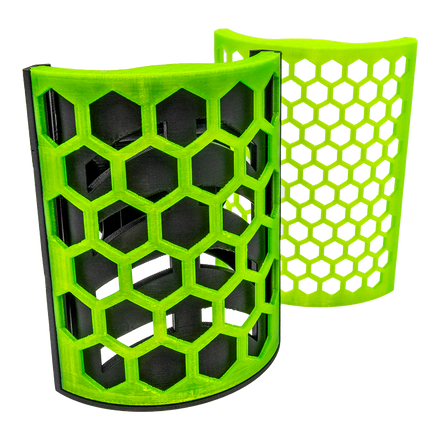
Printed Reef Nori Feeder

Printed Reef Sand Sifter
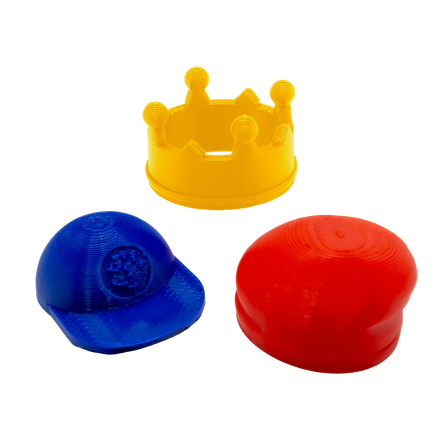
Printed Reef Sea Urchin Hats | Set of 3
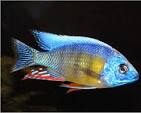
Taiwan Reef Cichlid (Protomelas sp. "Steveni Taiwan")
Tigriopus Californicus Reef Copepods
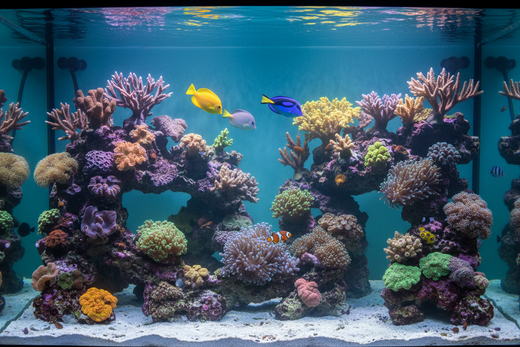
How to Build a Low-Stress Reef Tank Routine That Keeps Corals and Fish Thriving

Reef Tank Trend: “Microbiome” Thinking (Why Bacteria Diversity Can Make Reefs More Resilient)

LPS Coral Care Basics: How to Keep Euphyllia, Acan, and Other Favorites Happier

How to Cycle a Reef Tank (Beginner Timeline + What “Stable” Really Means)

Nitrate & Phosphate in Reef Tanks: The Balance That Prevents Algae (and Pale Corals)
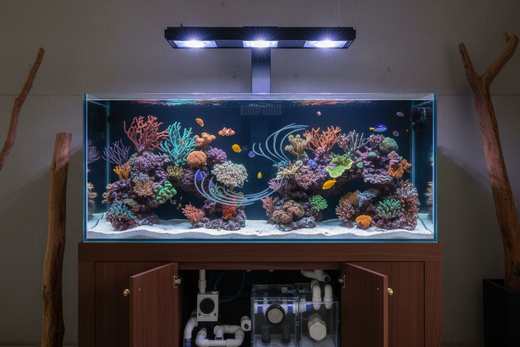
Reef Filtration & Flow Basics: The “Invisible” Setup That Keeps Corals Happier

Reef Automation Trend: ATO + Dosing for Stability (When It Helps—and When It’s Overkill)

Cloudy Reef Tank Water: The 5 Most Common Causes (and the Calm Fix for Each)
The whole guide, free to read right here — habitat, diet, lighting, troubleshooting and a first-48-hours quick start. No email required.
A healthy saltwater reef tank is one of the most beautiful things a person can build in a living room — a slow, glowing garden of corals, with a pair of clownfish bickering over the best spot and a hundred tiny things moving in the rockwork after the lights go down. It is also one of the more demanding hobbies in the pet world, and we would rather tell you that now, kindly, than have you find out in month three. A reef tank costs real money up front, takes months to mature, and rewards patience far more than it rewards spending. The good news is that the beginners who do best are not the ones with the biggest budgets or the fanciest gear. They are the ones who go slowly, test often, change one thing at a time, and let the tank settle into a steady rhythm. This guide is written for exactly that keeper. Read the Quick Start first, resist the urge to buy livestock on day two, and remember our motto for this whole hobby: stability first.
This sequence assumes your tank, stand, and equipment have arrived and you have a source of clean water. Do not skip the leak test; finding a leak with 40 gallons of saltwater in the room is a very different experience from finding it with tap water.
What needs to be in the house before you start, and what to look for in each category.
Ready to set up? Browse the essentials in our collections: Reef Supplies, Aquarium Lighting and Aquarium Filters, Pumps & Media.
Enrichment, one click away. Shop Aquarium Decorations and Accessories.
A reef tank is a saltwater aquarium designed to keep living corals alongside fish and invertebrates (animals without backbones, like snails, shrimp, and crabs). Unlike a fish-only saltwater tank, where the goal is simply clean water for fish, a reef tank has to meet the needs of the coral animals themselves, which depend on stable chemistry, strong light, and gentle but constant water movement. A reef is not a decoration with fish in it. It is a small, closed ecosystem you are responsible for balancing.
| Trait | Detail |
|---|---|
| Typical beginner size | 30 to 60 gallons; very small tanks (under about 20 gallons) are less forgiving because mistakes change the water faster |
| Difficulty | Moderate to demanding; patience matters more than experience |
| Time to mature | Cycling takes 4 to 8 weeks; a tank looks "settled" after 6 to 12 months |
| Beginner setup cost | Roughly $1,500 to $3,500 for a quality 40-gallon system including rock, sand, lighting, and test gear |
| Ongoing monthly cost | Roughly $50 to $150 for salt, RO/DI water, test reagents, food, and electricity |
| Daily time | 10 to 15 minutes of checking and feeding |
| Weekly time | 30 to 60 minutes of water changes and testing |
| Lifespan of livestock | Clownfish: 10+ years; many soft and stony corals: decades if stable |
| Common beginner mistake | Adding livestock too fast and chasing numbers instead of keeping things steady |
| Biggest rule | Stability first |
A reasonable beginner reef costs far more than a freshwater tank, and anyone telling you it is cheap and easy has something to sell you. The equipment is only part of it. The bigger investment is time: weeks of cycling before a single fish goes in, a year of watching the tank find its balance, and a habit of weekly maintenance that never really ends. We say this kindly, not to scare you off. Plenty of first-time keepers succeed. They do it by buying good basic gear once instead of cheap gear twice, by skipping "must-have" gadgets, and by choosing livestock that forgives mistakes.
Think of a reef like a vegetable garden: you do not rush it, you tend it. It rewards the person who is there every day, doing small things.
A quick vocabulary note before the chart: LPS stands for large-polyp stony corals, which build limestone skeletons topped with fleshy, rounded polyps. SPS means small-polyp stony corals, which grow tiny, delicate polyps on branching or plating skeletons and demand tighter stability and stronger light. SPS are a rewarding step, but not a first step.
| Livestock | Type | Difficulty | Light | Flow | Notes |
|---|---|---|---|---|---|
| Ocellaris clownfish (captive-bred) | Fish | Easy | Any | Moderate | Hardy, peaceful with others, usually accepts frozen and pellet foods |
| Yellow watchman goby | Fish | Easy | Any | Low to moderate | Sifts sand; calm; needs a tight lid because many gobies jump |
| Royal gramma | Fish | Easy | Any | Moderate | Colorful; territorial toward other grammas; likes rock caves |
| Blennies (various) | Fish | Easy | Any | Moderate | Entertaining; some graze algae, so make sure there is enough to eat |
| Firefish | Fish | Easy | Any | Moderate | Shy, graceful; needs a lid and hiding places |
| Zoanthids | Soft coral | Easy | Low to moderate | Low to moderate | Spreads in mats; contain palytoxin; wear gloves and eye protection when handling |
| Mushroom corals | Soft coral | Easy | Low | Low | Very forgiving; spread slowly across rock |
| Leather corals | Soft coral | Easy to moderate | Moderate | Moderate | Release chemicals; need good water changes and filtration |
| Xenia | Soft coral | Easy but invasive | Moderate | Moderate | Pulsing stems are mesmerizing; can take over; place on an isolated rock |
| Hammer and frogspawn | LPS | Moderate | Moderate | Low to moderate | Long sweeper tentacles; keep 6+ inches from neighbors |
| Torch coral | LPS | Moderate | Moderate | Low to moderate | Beautiful and sticky; also stings; needs space |
| Acan (Acanthastrea-type) | LPS | Moderate | Low to moderate | Low | Colorful; feeds well on target feedings |
Hardy fish and soft corals come first, LPS follow once the tank has proven itself, and we cover SPS briefly later as a next step.
Four things catch most first-time reef keepers off guard. The first is how long it takes: the "ugly stage" of brown and green algae that blooms during the first two or three months is normal, and it passes. The second is that chasing perfect numbers makes things worse: a steady alkalinity of 8 dKH (alkalinity is the water's buffering strength, covered in the chemistry section) is better than one that swings between 7 and 10 as you correct it. The third is how much the quality of your water matters: the small gap between "okay" and "good" water is what separates a struggling tank from a thriving one. The fourth is how alive it feels: clownfish rearranging sand and corals growing millimeters a week make it feel like a very slow, very beautiful garden.
A reef tank is really two spaces joined by plumbing: the display tank where the corals and fish live, and a sump — a second tank or chamber, usually below or behind the display, that holds the equipment and adds extra water volume. More water means slower swings in temperature and chemistry, and that is the whole point. Beginner-friendly "all-in-one" tanks build the sump into a rear chamber; the principles are the same either way.
Picture a side-view diagram, left to right, with water traveling in a loop. Every label below is a point on that diagram.
| Label | Component | Where it sits | What it does |
|---|---|---|---|
| A | Display tank | Center of the diagram, on the stand | Houses rock, sand, fish, and corals; the glass or acrylic box everyone sees |
| B | Overflow box (a weir with a toothed edge) | Back corner or rear wall of the display, at water level | Skims the top few millimeters of surface water, where oils and film collect, and sends it out of the display |
| C | Drain line with a gate valve | Pipe from the overflow down through the stand | Carries water by gravity to the sump; the valve lets you tune how quietly it flows |
| D | Mechanical filter (filter sock or mesh) | First chamber of the sump, directly under the drain | Catches larger particles before they break down; rinse or replace it every few days |
| E | Protein skimmer | Second chamber of the sump | A device that mixes water with fine air bubbles; organic waste sticks to the bubbles and is collected as foam in a removable cup |
| F | Baffles (glass dividers) | Between sump chambers | Slow the water and keep bubbles from drifting into the return |
| G | Heater and probes, plus an optional refugium | Calm middle chamber of the sump | The heater lives out of sight here; a refugium is an optional chamber with macroalgae under a light that absorbs nutrients |
| H | Return chamber, return pump, and ATO sensor | Last chamber of the sump | The water level here stays steady because the ATO tops off evaporation; the pump pulls water from this spot |
| I | Return line and nozzles | Pipe from sump pump up behind the tank, ending in adjustable nozzles | Pushes clean, warm water back into the display; aim nozzles to create gentle surface ripple |
| J | Powerheads | Inside the display, on the back or side glass | Add random, wide circulation so water reaches every coral and dead spots do not collect debris |
| K | ATO reservoir and top-off pump | Beside the stand, with a tube running to chamber H | Holds a few days of fresh RO/DI water and replaces evaporation automatically |
| L | Lid or screen cover | Over the display | Keeps jumpy fish from leaping out and reduces evaporation |
The loop closes: water leaves the display at B, drops through C into D, E, F, G, and H, and rises at I back into A, continuously.
When the return pump stops, water in the pipes keeps draining down for a minute or two until the siphon breaks. Your sump has to be able to hold that extra water without overflowing. Before you add any rock or sand, fill the system to its normal running level, then switch off the return pump and watch how high the sump rises. If it gets within an inch of the top, lower the running water level or add a siphon break (a small hole in the return line just under the surface). Doing this test once in a dry run prevents a flooded floor on the day the power flickers.
| Equipment | Beginner target | Notes |
|---|---|---|
| Tank | 30–60 gallons | Large enough to stay stable; small enough to fit in a weekly water change routine |
| Return pump | 3–5 times tank volume per hour, after accounting for height | Pump ratings drop with height; check the manufacturer's flow curve |
| Powerheads | Together with the return, roughly 10–20 times tank volume per hour for soft and LPS reefs | Use at least two, pointed so they cross and bounce off the glass |
| Heater | About 3–5 watts per gallon, ideally as two smaller heaters | Two small heaters fail more gently than one large one |
| Temperature controller | Plugs between heater and outlet | Turns the heater off if a thermostat sticks |
| Protein skimmer | Rated for your tank volume or a size up | Needs 2–4 weeks to "break in" with erratic foam |
| ATO | Optical sensor with a second backup sensor | A failed ATO either floods your sump or lets salinity climb |
| Lid or screen top | Fits snugly | Many gobies, blennies, and firefish jump |
We recommend one for nearly every beginner reef, and here is why. A skimmer removes dissolved organic waste before it breaks down into nitrate and phosphate, and it adds oxygen exchange. In a first tank, where you will inevitably overfeed once or twice, a skimmer is cheap insurance.
A skimmer is optional in a few cases: a very lightly stocked tank with frequent water changes, a tank running a well-managed refugium with fast-growing macroalgae, or a nano tank where a skimmer would be oversized. If you skip it, plan on more frequent water changes, rinse your filter sock twice a week, feed lightly, and watch your nitrate and phosphate closely.
Keep power strips and controllers above the water line and make every cord a drip loop — let it hang down below the outlet and curve back up, so water running along the cord drips off at the bottom instead of reaching the plug. Use GFCI protection, label your plugs, and avoid daisy-chaining power strips. Leave room behind the tank to reach everything, and mark the normal sump water level with tape so any change is obvious at a glance.
Rock does two jobs in a reef: it is the reef's skeleton, and it is the main home of the beneficial bacteria that process waste. Live rock is rock that has spent time in the ocean or an established system and arrives carrying bacteria and small organisms. Dry rock is cured, lifeless rock (often from old reef limestone or ceramic) that you seed yourself. Bagged bacteria are bottled or packaged cultures of the beneficial microbes that help a new tank cycle faster.
| Option | Cost | Pest risk | Cycle speed | Best for |
|---|---|---|---|---|
| Dry rock | Lowest | Very low; essentially none | Slowest (4–8 weeks) | Most beginners; a clean start with no surprises |
| Live rock (cured) | Highest | Moderate to high; hitchhikers like aiptasia, mantis shrimp, and nuisance algae may come along | Fastest, with a mini die-off to manage | Keepers who want instant biodiversity and accept pest risk |
| Dry rock plus bagged bacteria | Low to moderate | Very low | Moderate (3–6 weeks), but still test to confirm | Beginners who want a clean start and a small head start |
Our own advice: start with dry rock and a bottle of bacteria, then add a small piece of cured live rock or a small amount of mature-tank rubble (from a trusted source) for biodiversity once the cycle finishes and your quarantine routine is in place. You get most of the benefit with a fraction of the pest risk.
| Option | Depth | Pros | Cons |
|---|---|---|---|
| Bare bottom | None | Easiest to clean; no hiding place for detritus (settled debris); great for quarantine and frag tanks | Less natural; some fish enjoy sifting sand; glass can look stark |
| Thin aragonite layer | About 1 inch | Natural look, easy to vacuum lightly, mild bacteria surface | Needs occasional gentle stirring to prevent debris pockets |
| Deeper aragonite bed | 2–3 inches | More surface area for bacteria; suits sand-sifting gobies | Can trap waste and require care; old advice about deep sand beds is mixed, so keep it modest |
Aragonite is a natural calcium carbonate sand that dissolves very slowly and helps buffer pH. Rinse it well before use, and do not use silica play sand, which feeds nuisance algae.
| Pest | What it is | Risk |
|---|---|---|
| Aiptasia | A small, fast-multiplying glass anemone (a stinging, tentacled animal) that arrives on live rock or coral | Spreads quickly; stings neighbors; hard to remove once established |
| Bubble algae (Valonia) | Green balls that look like shiny marbles | Pop and spread spores if broken; remove carefully |
| Mantis shrimp | A predatory crustacean that can hide in rock for months | Can kill fish and snails; large smasher types can crack glass |
| Red flatworms and others | Small, flat, fast-moving pests | Can smother corals; diagnosed by close inspection |
Examine every rock, coral, and frag closely before it enters the display, and dip every new coral first.
Corals are sensitive animals that live in water chemistry far more consistent than anything in a fish bowl. Getting these numbers into range matters. Keeping them steady matters more. A tank holding alkalinity at 9 every single day will outperform a tank that swings between 7 and 11, even though both are "in range."
| Parameter | Target | How to test | What goes wrong when it's off |
|---|---|---|---|
| Temperature | 77–79°F | Digital thermometer, plus a second one for cross-checking | Above 84°F: coral bleaching and fish stress; below 74°F: slowed growth and weakened immunity; daily swings over 2°F stress everything |
| Salinity | 1.025–1.026 SG (about 35 ppt) | Calibrated refractometer | Too high: dehydrates animals, shuts down polyps; too low: stresses fish and slows coral growth; fast changes are far more harmful than a slightly "off" steady number |
| Alkalinity | 8–9 dKH (acceptable roughly 7–11) | Titration kit | Low: slow growth and tissue recession; high: burnt tips and tissue loss in stony corals; swings of more than about 1 dKH a day are the real danger |
| Calcium | 400–450 ppm | Titration or reliable colorimetric kit | Low: stony corals stop building skeleton; high: precipitation that clouds water and clogs equipment |
| Magnesium | 1250–1350 ppm | Titration or reliable colorimetric kit | Low: makes it hard to hold steady alkalinity and calcium; high: rare and rarely a problem |
| pH | 8.1–8.4 | Digital pH probe or reliable kit | Normal daily swing of 0.1–0.3; persistently low pH usually points to poor gas exchange or elevated CO2 indoors |
| Ammonia | 0 | Ammonia test kit | Any reading is toxic to fish and corals; indicates a failed cycle or a dead animal |
| Nitrite | 0 | Nitrite test kit | Toxic; its presence means the cycle is incomplete or has crashed |
| Nitrate | Roughly 2–10 ppm (not zero) | Low-range nitrate kit | Below 1: corals pale and dinoflagellates can bloom; above 20–30: algae outbreaks and stressed corals |
| Phosphate | Roughly 0.03–0.1 ppm | Ultra-low-range phosphate test | Near zero: corals pale, tissue loss, dinoflagellates; above 0.2: algae, slow coral growth |
A few definitions. Alkalinity measures the water's buffering capacity — how well it resists swings in pH — and is reported in dKH (degrees of carbonate hardness). Some kits use other units: 8 dKH is the same as about 2.9 milliequivalents per liter or about 143 ppm. Specific gravity (SG) is how dense the water is compared with pure water; 1.025 to 1.026 corresponds to roughly 35 parts per thousand (ppt) salinity. Bioload is the total amount of waste your animals produce, the main driver of nitrate and phosphate. pH measures how acidic or basic the water is.
A common beginner trap is trying to scrub nitrate and phosphate to zero. Corals and the microscopic life that feeds them actually need a small, steady supply of both. When nutrients bottom out, corals turn pale and tissue recedes, and tanks can fall prey to dinoflagellates (microscopic algae-like organisms that form snotty brown strings and bubbles on rock and sand) — the classic "too clean" problem. On the other end, high nutrients feed cyanobacteria ("cyano," the slime-forming red mats) and hair algae. Our goal is low and steady: nitrate near 2 to 10 ppm and phosphate near 0.03 to 0.1 ppm, with changes measured in weeks, not days.
Mix every batch of salt water in the same dedicated container, using RO/DI water and reef salt, and let it circulate with a heater until it matches the tank's temperature and salinity. Check it with the refractometer before it ever touches the display. Do a water change of about 10% weekly or 20% every two weeks, using temperature- and salinity-matched saltwater. Siphon detritus (settled debris) from the sand and rock surfaces while you do. Water changes replace trace elements and dilute nutrients.
| How often | What to test | Why |
|---|---|---|
| Daily | Temperature; salinity glance (ATO reservoir level); look at the tank | Early warning signs catch problems at the cheapest point |
| Weekly during the first three months | Alkalinity, salinity (refractometer), nitrate, phosphate, ammonia and nitrite | A new tank changes fast; weekly trends beat single readings |
| Weekly after the tank is stable | Alkalinity, salinity, nitrate, phosphate | Keeps drift visible |
| Every two weeks | Calcium and magnesium | These move slowly in a lightly stocked tank |
| Monthly | Full panel, calibrate refractometer with calibration solution, check kit expiry dates | Test kits expire and refractometers drift |
| Annually | Replace all test reagents and probes that are due | Old chemicals give wrong readings |
Write every number down. A notebook full of readings tells a story, and it is the story that helps you diagnose a problem.
Cycling is the slowest and most important part of the hobby, and the part newcomers most want to skip. Please do not. A cycled tank has a big enough population of beneficial bacteria to turn ammonia into nitrite and then nitrate as fast as it appears. An uncycled tank poisons whatever you put in it.
| Stage | Typical timing | What you'll see | What to do |
|---|---|---|---|
| Setup | Day 1 | Clear water, new rock, a faint smell of the sea | Add your ammonia source to reach about 2 ppm; start a logbook |
| Ammonia phase | Weeks 1–3 | Ammonia reads high, then begins to fall; a brown film of diatoms (golden-brown algae) coats sand and rock | Test every few days; do not add livestock; leave the lights on a short 6–8 hour schedule |
| Nitrite phase | Weeks 2–5 | Ammonia falls to 0, nitrite spikes then falls | Keep testing; patience |
| Nitrate phase | Weeks 4–7 | Nitrite reaches 0 and nitrate climbs; the "ugly stage" of green and brown algae appears | Do not scrub everything; a partial water change (about 25%) can lower nitrate |
| Confirmation | Weeks 4–8 | Re-dose ammonia to about 2 ppm; 24 hours later, ammonia and nitrite both read 0 | This is the real finish line: stable ammonia-processing ability |
| Ready for a clean-up crew | After confirmation | Stable test results across several days | Do a water change if nitrate is high, then add the first animals |
The usual window is 4 to 8 weeks. Bottled bacteria and a bit of mature rock can shorten it, but a test that shows ammonia and nitrite at 0 is the only thing that proves you are done. If the numbers say "not yet," the answer is wait. Do not do a "fish-in cycle" by using living animals to feed the bacteria; it is unkind and unreliable.
| Step | When | Livestock | Notes |
|---|---|---|---|
| One | After cycling is confirmed | Clean-up crew (CUC): a modest group of small snails and a few hermit crabs | Roughly one snail per two gallons is plenty; too many starve and foul the water |
| Two | 1–2 weeks later | First one or two hardy fish: captive-bred ocellaris clownfish, firefish, yellow watchman goby, a blenny, or a royal gramma | Add one species at a time; leave two to four weeks between additions |
| Three | About 6–12 weeks after cycling | Soft corals: zoanthids, mushrooms, leather corals, and xenia (with care) | Start with one or two; watch alkalinity and nitrate for a month |
| Four | About 4–6 months in | LPS: hammer, frogspawn, torch, acan | Give each space for sweeper tentacles; target-feed lightly |
| Five | After a year or more of steady results | SPS (small-polyp stony corals) | Strong light and flow; extremely sensitive to swings; a milestone, not a starting point |
Choose captive-bred fish and aquacultured corals whenever you can, and never buy wild-caught livestock that cannot be traced to a responsible source. Bioload grows with every addition. If algae flares up or nitrate climbs after you add something, pause the next addition until the tank settles.
A quarantine tank is a small, bare separate tank where new fish live for at least 4 weeks (many keepers choose 6) before they join the display, so that any disease shows up away from your corals. The usual culprit is marine ich (a skin parasite called Cryptocaryon). If you treat a sick fish with copper, do it in the quarantine tank, never the display. Dip new corals in a coral dip made for the purpose, and inspect each one with a flashlight for pests.
Always drip-acclimate fish and invertebrates: float the bag for temperature matching, then slowly drip tank water into the bag over 30 to 60 minutes so they adjust to your salinity. Never pour bag water into your display.
Not every fish is reef-safe. Butterflyfish, many angelfish, triggerfish, and puffers often nip corals or clams. Some wrasses eat snails or shrimp. Corals have personalities too: many LPS and some soft corals extend sweeper tentacles that sting neighbors, so leave at least 6 inches between aggressive corals and others. Sea anemones (like the bubble-tip anemone in our cover art) are an advanced step, best attempted after a year of stability. Captive-bred clownfish do not need one to be happy.
Once your tank has been stable for a year, you may want to try fragging — cutting a healthy coral into smaller pieces ("frags") and attaching each to a plug. Frags are how reefers share corals, swap with local clubs, and keep wild reefs intact. Use sharp bone cutters or a sterile blade, wear gloves and eye protection, never frag stressed corals, and keep a coral dip ready. A frag tank is a small, shallow, separate system with its own light, flow, and heater where frags can grow out before being shared or placed in the display. It also doubles as a second holding tank. Buying frags from a local reef club or a reputable aquaculture source is the most sustainable way to expand a collection.
Reef feeding is a balancing act, and the number-one rule is to feed the fish, not the tank. Everything you put in the water either becomes animal, or becomes waste that fuels algae. Our approach matches how we stock our own shelves: Clean Fuel, No Junk. Choose simple, high-quality foods, avoid fillers, and use less than you think.
Feed most community reef fish once or twice daily, only as much as they finish in one to two minutes. Rotate several foods: thawed frozen mysis shrimp (small shrimp-like animals, a staple), high-quality small pellets with simple ingredient lists, and nori (dried seaweed) clipped to the glass a few times a week for herbivores like blennies. Thaw frozen cubes in a cup of tank water and pour the food through a fine strainer or soak and drain, so the packing juice never goes in your display. Skip one day a week to keep the system tidy.
Healthy corals get most of their energy from light via symbiotic algae inside their tissue, plus particles and plankton they catch from the water. Soft corals and most beginner reef tanks do not need extra feeding at all. LPS can be target-fed (feeding a coral directly with a pipette) once or twice a week with a tiny amount of meaty food, as long as the extra food does not raise nitrate or phosphate. A pod population — copepods and amphipods (tiny crustaceans that graze on algae and detritus) — appears naturally in a mature tank and is an excellent live food source.
Think of your tank as a bank account. Food and fish waste are deposits; water changes, the skimmer, and algae and coral growth are withdrawals. Deposits outpacing withdrawals means algae; starving the account means the "too clean" problem. Aim for stable, modest feeding that keeps nitrate near 2 to 10 ppm and phosphate near 0.03 to 0.1 ppm.
| Food | Verdict | Why |
|---|---|---|
| Freshwater feeder fish or live goldfish | Never | Can carry parasites and fatty acids that harm marine fish |
| Bread, human leftovers, or cooked foods | Never | Fouls water; nothing a marine fish needs |
| Fatty meats like beef heart or cooked chicken | Avoid | Mammal and poultry fats are poorly digested by marine fish and spike nutrients |
| Heavily filled flake or cheap pellets | Avoid | Low-quality fillers become waste; clouds water |
| Anything fed in large amounts at once | Never | The most common cause of nutrient crashes and algae |
| Wild-collected live food from ponds or beaches | Never | Brings disease, parasites, and freshwater |
| Expired or freezer-burned food | Avoid | Loses nutrition; adds waste |
| Food rinsed or thawed in tap water | Never | Tap water carries chloramine, copper, and phosphate |
Shop the food and supplies: Browse Food for Aquatics.
PAR (photosynthetically active radiation) measures how much usable light reaches a coral, and is reported in micromoles per square meter per second. Corals from different reef zones need very different amounts. The table gives rough working ranges. Always check the specific coral's care notes.
| Coral type | Rough PAR range | Placement |
|---|---|---|
| Soft corals (mushrooms, leathers, zoanthids, xenia) | About 25–75 | Lower or shaded rock, sides, mid-tank |
| LPS (hammer, frogspawn, torch, acan) | About 50–150 | Mid-tank, on rock or sand away from strong flow |
| SPS | About 200–400 | Upper rockwork under bright, steady light |
A light that is too bright bleaches corals (pale or white); a light that is too dim leaves them dark brown and stretched. Run lights on a timer for 8 to 10 hours, with a gradual sunrise and sunset ramp if your fixture supports it.
Every new coral should be acclimated gradually. Place it low in the tank (or turn the light down to about half) for the first week, then raise it or increase intensity slowly over several weeks. Move corals up only if they look healthy and open. Never move a coral from a dim store tank straight under full-strength light.
Good flow carries food to corals, carries waste away, keeps detritus from settling, and brings oxygen to the surface. Think of a gentle breeze rather than a laser. Random, wide-spread flow beats a single powerful stream. Place powerheads so they cross, or use a wave-making controller; point them at the glass or open water, never straight at a coral. Soft and LPS corals prefer lower flow; SPS like more. If a coral's polyps are blown flat, flow is too strong; if debris settles on rocks, it is too weak. A pinch of fine food shows you where the water travels.
Almost every reef problem has the same first answer: test, then slow down. Never "nuke" a tank with chemical cure-alls; they tend to crash the bacteria you spent two months growing.
What you see: dark red, maroon, or green slimy mats on sand and rock that peel off in sheets and smell musty. Why: cyanobacteria (cyano, a bacteria that behaves like algae) thrives on excess nutrients, especially phosphate, plus low flow in dead spots. What to do: siphon it out during water changes, increase flow to the affected area, trim feeding, and confirm your RO/DI water is clean. When to ask for help: if it keeps returning after two weeks of corrections, or coats corals.
What you see: brown, snotty strings or bubbly film on sand, rock, and corals, often worst in the morning. Why: often triggered when nitrate and phosphate bottom out, or after sudden changes. What to do: stop trying to strip nutrients; stabilize them at low-but-measurable levels, keep up with water changes, siphon the strands, and avoid chemical treatments without guidance. When to ask for help: right away; dinos are stubborn, and an experienced reefer or our team can help you pick a safe path.
What you see: green strands growing on rock like a lawn. Why: excess nitrate or phosphate, too much light, or an overgrown "ugly stage." What to do: hand-pull, trim feeding, tune the photoperiod, and keep up the water changes; algae-eating snails help but are not the solution alone. When to ask for help: if it overruns corals or persists for months.
What you see: shiny green balls on rock, from pea-sized up. Why: it arrives on live rock or coral and thrives on nutrients. What to do: remove whole bubbles without popping them (use a small bowl of tank water and tweezers), then keep nutrients steady. When to ask for help: when it spreads faster than you can remove it.
What you see: small, translucent, brownish anemones sprouting from rock crevices, multiplying quickly. Why: hitchhikers on rock or frags. What to do: use an aiptasia-specific product or a gentle injection method, or add a specialist predator (check with us first); do not scrape, because it can spread bits. When to ask for help: if they have reached corals or you cannot keep up.
What you see: a brown, jelly-like slime covering a dying coral, usually quickly spreading. Why: bacteria feeding on decaying tissue, often triggered by stress or a damaged coral. What to do: remove the affected coral immediately in a bag, place it in a separate bucket, and do a water change. When to ask for help: if more than one coral is affected.
What you see: a coral that normally extends its polyps stays closed, shrinks, or shows bare skeleton. Why: a sudden parameter change, a new coral stinging a neighbor, too much light or flow, or a pest. What to do: test everything, check for neighbors and pests, and keep conditions steady. Corals often close for a day after being moved. When to ask for help: if it stays closed for more than a few days.
What you see: tissue peeling off the skeleton, either rapidly (rapid tissue necrosis, RTN) or slowly from the base (slow tissue necrosis, STN). Why: unstable alkalinity, temperature stress, or pest infection. What to do: frag healthy tissue away from the dying edge if possible, quarantine it, and correct the underlying parameter. When to ask for help: immediately, because RTN can claim a coral in a day.
What you see: tiny white dots like salt grains on fish, scratching, rapid breathing, hiding. Why: a parasite that arrives on new fish and strikes during stress. What to do: move affected fish to a quarantine tank for treatment; never medicate the display with copper. When to ask for help: at the first sign; fish can decline within days.
What you see: alkalinity or salinity numbers that bounce around, corals that look dull. Why: inconsistent water changes, a faulty ATO, or evaporation that is not being replaced evenly. What to do: identify the cause before correcting; then move slowly, one parameter at a time. When to ask for help: if the swing exceeds 1 dKH a day.
What you see: dead silence, falling temperature, or water temperature above 82°F in summer. Why: an outage, a failed heater or controller, or a heat wave. What to do: run a battery air pump, cover the tank to hold heat in a winter outage, or use fans, remove the lid, and lower lights in a heat event. When to ask for help: as soon as temperature stays above 84°F or below 72°F.
What you see: a quiet pump, a stagnant tank, or a sump that rises or empties. Why: a clogged impeller, blocked overflow, or failed pump. What to do: unplug, clear, and clean it; swap in your spare. When to ask for help: if flow does not return within an hour.
What you see: cloudy water, algae blooms, rising nitrate and phosphate, uneaten food. Why: too much, too often. What to do: cut portions in half, siphon leftovers, and do a water change. When to ask for help: if fish seem sluggish or nitrate stays high.
What you see: unfamiliar worms, flatworms, crabs, or a shrimp hiding in rock; clicking or snapping sounds at night. Why: they arrive on rock or corals. What to do: dip every coral, quarantine fish, and inspect at night with a red flashlight. When to ask for help: if animals vanish unexpectedly, you may have a mantis shrimp.
| What you see | Likely cause | First move | Urgency |
|---|---|---|---|
| Dark red slime on sand | Cyanobacteria | Siphon, add flow | Within a week |
| Brown strings and bubbles | Dinoflagellates | Stabilize nutrients; ask for help | Within days |
| Green lawn on rock | Hair algae | Hand-pull; trim feeding | Within a week |
| Brown slime over a coral | Brown jelly | Bag and remove coral | Same day |
| Coral shrinking or peeling | Recession or necrosis | Test; check neighbors | Same day |
| White dots on fish | Marine ich | Quarantine and treat | Same day |
| Tank silent, temperature moving | Power or heater failure | Battery pump; fix heat | Immediately |
| How often | What to do |
|---|---|
| Daily | Check temperature, flow, and that every pump, the skimmer, and the light are running |
| Daily | Watch every fish at feeding time: eating, breathing normally, no spots or scratching |
| Daily | Feed fish lightly; look at corals for open polyps and normal color |
| Daily | Check the ATO reservoir and sump water level |
| Weekly | Water change of about 10% (or 20% every two weeks) with matched RO/DI saltwater; siphon detritus |
| Weekly | Test alkalinity, salinity, nitrate, and phosphate; write results in the log |
| Weekly | Clean the glass, empty the skimmer cup, and rinse or replace the filter sock |
| Weekly | Inspect powerheads and nozzles for debris |
| Every two weeks | Test calcium and magnesium; top off salt supplies |
| Monthly | Calibrate the refractometer; clean the skimmer body and pump; check heater and controller function |
| Monthly | Refresh RO/DI filters per your TDS reading; check test-kit expiry dates |
| Quarterly | Deep-clean pumps, clean the ATO sensors, and replace any worn tubing |
| Annually | Replace test reagents, review your emergency kit, and consider replacing aging heaters and pumps |
Reef animals hide trouble until it is serious. If you are not sure, ask. A quick call costs nothing, and your local reef club or fish store will usually help too.
Act today:
Ask within a few days:
Call us at (717) 983-8069 or visit your local fish store. For sick fish, an aquatic veterinarian is worth finding before you need one, though they can be hard to locate.
A solid beginner reef in the 30 to 60 gallon range typically costs about $1,500 to $3,500 to set up, including the tank, stand, rock, sand, lighting, flow, skimmer, ATO, test kits, and a first round of livestock, with ongoing costs of roughly $50 to $150 a month for salt, RO/DI water, reagents, food, and electricity. Costs climb with larger tanks, premium lighting, and lots of corals. The most reliable way to spend wisely is to buy dependable basic gear first and add livestock slowly.
Most reef tanks take 4 to 8 weeks to cycle. Dry rock plus bottled bacteria usually finishes in about 3 to 6 weeks, and live rock can be faster but brings a die-off to manage. You are done when you can add an ammonia source, wait 24 hours, and find ammonia and nitrite both at 0, and when nitrate has settled. Resist rushing; fish added too early are the most common beginner heartbreak.
Aim for 1.025 to 1.026 specific gravity, which is about 35 parts per thousand (ppt), measured with a calibrated refractometer rather than a floating hydrometer. The exact number matters less than keeping it steady. Fast changes harm corals and fish far more than a slightly high or low steady reading. Use a good ATO so evaporation is replaced with fresh RO/DI water, and recalibrate the refractometer monthly.
Yes, in practice it is effectively mandatory. Tap water carries phosphate, silicate, copper, and chloramines that fuel algae and harm corals, and tap water in many parts of Pennsylvania is also quite hard, which makes that even more true (your own supply may differ, so have it tested). RO/DI water starts as a clean slate so that you control exactly what goes into the tank. Buy it by the jug or install a small RO/DI unit, test with a TDS meter (aim for 0), and use it for salt mixing and top-off.
The easiest corals are soft corals: mushrooms, zoanthids (handle with gloves and eye protection because they contain palytoxin), leather corals, and xenia (isolate it on its own rock, as it spreads). After a few months of stability, add LPS such as hammer, frogspawn, torch, and acan, giving each space to extend sweeper tentacles. Leave SPS and anemones for later. Buy aquacultured corals and frags from local reefers whenever you can.
Start with captive-bred ocellaris clownfish, then consider firefish, a yellow watchman goby, blennies, or a royal gramma. Add one or two at a time, quarantine each, and avoid fish that nip corals or outgrow a small tank, such as tangs in 30 to 60 gallons. Prefer captive-bred or traceable sources, since wild-caught fish that cannot be traced are a real sustainability problem.
A good rhythm is about 10% weekly or 20% every two weeks, using temperature- and salinity-matched RO/DI saltwater. Siphon detritus off the sand and rock while you drain. Water changes replace trace elements, dilute nutrients, and keep chemistry predictable. Pick whichever schedule you will actually keep. If something feels off, do a smaller extra change rather than adding chemicals.
Keep it between 77 and 79°F, with as little daily swing as possible (under 2°F). Use a heater with a separate controller and a backup thermometer. In summer, watch for heat events: sustained readings above 84°F can bleach corals. In winter, watch for failed heaters. Stable temperature matters more than a perfect number, so avoid placing the tank near windows or vents.
Most beginner reefs benefit from one. A skimmer pulls dissolved organic waste out of the water before it turns into nitrate and phosphate, and it forgives the occasional overfeeding. It is optional in lightly stocked tanks with frequent water changes or a well-run refugium, but if you skip it, expect to do more maintenance and watch nutrients closely. Choose a skimmer rated for your tank volume or higher.
Corals close for many reasons, so the first move is to test your water: look for changes in alkalinity, salinity, temperature, and nutrients. Then check for a neighbor stinging, a new light, too much flow, or a pest. A coral that was just moved or fragged may stay closed for a day. If several corals close at once, suspect water quality, and do a water change. If a single coral stays closed for more than a few days, ask for help.
Ready to shop? Start with Aquatics. 10% of every purchase supports no-kill animal shelters.
Before we earn a dime, 10% of every purchase at Walnut Creek Supply goes to no-kill animal shelters across the country. Not at checkout. Not as an option. Off the top of every order, every day, because we believe responsible pet ownership and community care are the same commitment made in two directions.
That matters for reef keepers too. Every captive-bred clownfish, every aquacultured frag, and every patient week of cycling is a small vote for a healthier hobby and healthier oceans. If you ever find yourself with a thriving tank and a few spare frags, share them with a local club, the way the best reefers always have.
We are a family business in Christiana, Lancaster County, Pennsylvania. We grow our own food, keep our own animals, and stock the goods we would put in front of our own families, with no mystery ingredients and no shortcuts. If you have a question about your cycle, your water numbers, or a coral that just does not look right, call us at (717) 983-8069. We would rather talk it through with you.
Welcome to the reef. Go slowly, test often, and enjoy the garden.
_From our family to yours,_ Walnut Creek Supply — Christiana, Lancaster County, Pennsylvania _walnutcreeksupply.com_
A solid beginner reef in the 30 to 60 gallon range typically costs about $1,500 to $3,500 to set up, including the tank, stand, rock, sand, lighting, flow, skimmer, ATO, test kits, and a first round of livestock, with ongoing costs of roughly $50 to $150 a month for salt, RO/DI water, reagents, food, and electricity. Costs climb with larger tanks, premium lighting, and lots of corals. The most reliable way to spend wisely is to buy dependable basic gear first and add livestock slowly.
Most reef tanks take 4 to 8 weeks to cycle. Dry rock plus bottled bacteria usually finishes in about 3 to 6 weeks, and live rock can be faster but brings a die-off to manage. You are done when you can add an ammonia source, wait 24 hours, and find ammonia and nitrite both at 0, and when nitrate has settled. Resist rushing; fish added too early are the most common beginner heartbreak.
Aim for 1.025 to 1.026 specific gravity, which is about 35 parts per thousand (ppt), measured with a calibrated refractometer rather than a floating hydrometer. The exact number matters less than keeping it steady. Fast changes harm corals and fish far more than a slightly high or low steady reading. Use a good ATO so evaporation is replaced with fresh RO/DI water, and recalibrate the refractometer monthly.
Yes, in practice it is effectively mandatory. Tap water carries phosphate, silicate, copper, and chloramines that fuel algae and harm corals, and tap water in many parts of Pennsylvania is also quite hard, which makes that even more true (your own supply may differ, so have it tested). RO/DI water starts as a clean slate so that you control exactly what goes into the tank. Buy it by the jug or install a small RO/DI unit, test with a TDS meter (aim for 0), and use it for salt mixing and top-off.
The easiest corals are soft corals: mushrooms, zoanthids (handle with gloves and eye protection because they contain palytoxin), leather corals, and xenia (isolate it on its own rock, as it spreads). After a few months of stability, add LPS such as hammer, frogspawn, torch, and acan, giving each space to extend sweeper tentacles. Leave SPS and anemones for later. Buy aquacultured corals and frags from local reefers whenever you can.
Start with captive-bred ocellaris clownfish, then consider firefish, a yellow watchman goby, blennies, or a royal gramma. Add one or two at a time, quarantine each, and avoid fish that nip corals or outgrow a small tank, such as tangs in 30 to 60 gallons. Prefer captive-bred or traceable sources, since wild-caught fish that cannot be traced are a real sustainability problem.
A good rhythm is about 10% weekly or 20% every two weeks, using temperature- and salinity-matched RO/DI saltwater. Siphon detritus off the sand and rock while you drain. Water changes replace trace elements, dilute nutrients, and keep chemistry predictable. Pick whichever schedule you will actually keep. If something feels off, do a smaller extra change rather than adding chemicals.
Keep it between 77 and 79°F, with as little daily swing as possible (under 2°F). Use a heater with a separate controller and a backup thermometer. In summer, watch for heat events: sustained readings above 84°F can bleach corals. In winter, watch for failed heaters. Stable temperature matters more than a perfect number, so avoid placing the tank near windows or vents.
Most beginner reefs benefit from one. A skimmer pulls dissolved organic waste out of the water before it turns into nitrate and phosphate, and it forgives the occasional overfeeding. It is optional in lightly stocked tanks with frequent water changes or a well-run refugium, but if you skip it, expect to do more maintenance and watch nutrients closely. Choose a skimmer rated for your tank volume or higher.
Corals close for many reasons, so the first move is to test your water: look for changes in alkalinity, salinity, temperature, and nutrients. Then check for a neighbor stinging, a new light, too much flow, or a pest. A coral that was just moved or fragged may stay closed for a day. If several corals close at once, suspect water quality, and do a water change. If a single coral stays closed for more than a few days, ask for help.
Every reef article we've published, in one place.